This is a 3 part series:
- Part I convers building the Blazor client and demonstrating how it can be used to process events in real time
- In Part II we demonstrate how we can leverage Azure and Github Pages in order to build a complete CI pipeline that builds and deploys the application automatically
- Finally, in part III we’re adding covering unit testing via Azure
Introduction
In the previous post we built a Blazor Web Assembly client application that displays the price for a basket of cryptocurrencies in real time. In this post we’ll learn how to build the repository using Azure and deploy the page to Github Pages automatically.
We’ll assume you have an Azure dev account and the repository is hosted on GitHub.
Head over to Azure dashboard, click on Pipelines -> New Pipeline
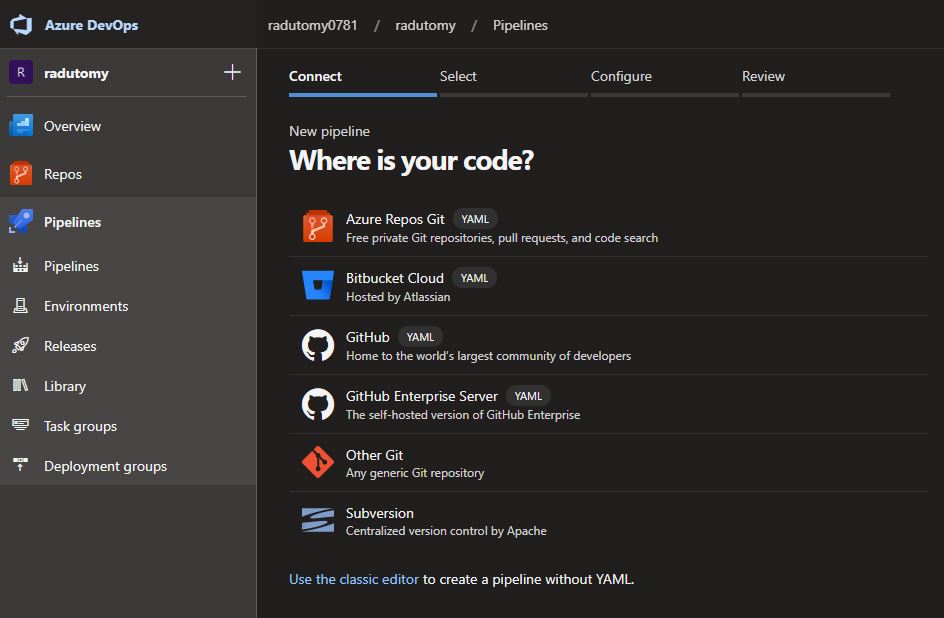
Select the repository where the Blazor app is hosted and then continue. On the next page you’ll be asked to chose your pipeline configuration. Select ASP.NET Core.

In the next page we need to configure the YAML that instructs the Azure VM to build our repository. We’ll use an Ubuntu VM with the latest Long Term Support release of .NET Core
The schematic is simple and follows this flow:
Copy from the repository -> Build the source code -> Publish the app artifacts -> Commit artifacts to GitHub Pages
I have annotated the script below.
# ASP.NET Core
# Build and test ASP.NET Core projects targeting .NET Core.
# Add steps that run tests, create a NuGet package, deploy, and more:
# https://docs.microsoft.com/azure/devops/pipelines/languages/dotnet-core

trigger:
- master

pool:
  vmImage: 'ubuntu-latest'	# the host OS image

variables:
  buildConfiguration: 'Release'	# dotnet core's configuration

steps:
- script: dotnet build --configuration $(buildConfiguration)	# the  script that gets executed in the host OS
  displayName: 'dotnet build $(buildConfiguration)'

- task: DotNetCoreCLI@2
  displayName: "Publish App"
  inputs:
    command: 'publish'
    arguments: '--configuration $(BuildConfiguration) --output $(Build.ArtifactStagingDirectory)'
    zipAfterPublish: false

- task: PublishBuildArtifacts@1
  displayName: "Upload Artifacts"
  inputs:
    pathtoPublish: '$(Build.ArtifactStagingDirectory)'
    artifactName: 'dist'

- script: |
    git config --global user.name "$GITHUBNAME"
    git config --global user.email "GITHUBEMAIL"
    cd $(Build.ArtifactStagingDirectory)/src/wwwroot
    touch .nojekyll
    git init
    git checkout -b gh-pages
    git add -A
    git commit -m "Created build"
    git push -f https://$GITHUBPAT@github.com/radutomy/RealTimeBlazor.git gh-pages
  displayName: 'Publish to GitHub Pages'
Click on Save and Run and we’re done with setting up Azure. Now every time we commit something to the repository, Azure will pick up the source code and publish out the website on the gh-pages branch in Github. All we need to do now is explicitly instruct GitHub to render the website based on the branch’s content.
Go to GitHub -> Project’s settings -> look for a section called GitHub Pages and set the source to gh-pages branch.
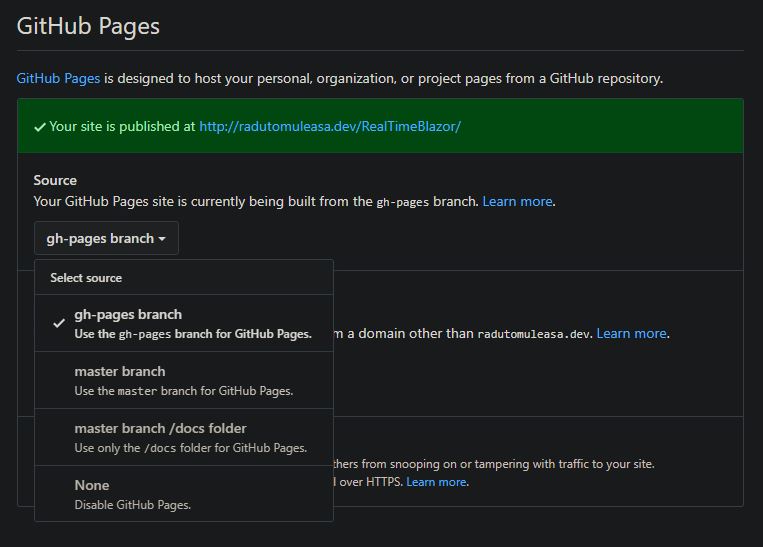
Wait for a few minutes for GitHub to render the website, and then we’re done! We can go to `http://username.github.io/projectname. In my case it’s http://radutomy.github.io/RealTimeBlazor
Demo pagee: https://radutomy.github.io/RealTimeBlazor/ Source code: https://github.com/radutomy/RealTimeBlazor